How To Install WordPress on Localhost in Six Steps
Setting up WordPress locally on your computer can be beneficial for your web development workflow. Whether you're building a site from scratch, testing new plugins or experimenting with themes, a local WordPress installation allows you to work offline and avoid making changes directly on your live site.
However, choosing the right local development setup is crucial. While XAMPP has long been a popular choice for WordPress developers, modern alternatives like DDEV and Lando offer more powerful features and better compatibility with professional hosting platforms like Pantheon.
This guide will walk you through:
- Setting up WordPress locally using XAMPP – best for beginners and simple projects.
- Using modern alternatives like DDEV and Lando – recommended for professional development.
- Troubleshooting common issues and optimizing your workflow.
- Seamlessly deploying your local site to production.
Let's start with the traditional XAMPP method, then explore more advanced options.
How To Install WordPress Locally With XAMPP
XAMPP sets up a local server environment on your computer by providing Apache (the web server), MySQL (the database) and PHP (the scripting language) – all of which are essential for WordPress to function. However, since Pantheon doesn’t support Apache, this method isn’t ideal if you plan to deploy to Pantheon in the future. We’ll walk you through an alternative method using Nginx later in this guide.
That said, the XAMPP approach is great for testing and development if you're working outside of Pantheon or want to experiment locally before pushing to a live site.
Step 1: Download and Install XAMPP
Head over to the official Apache Friends website and download the version of XAMPP compatible with your operating system (Windows, macOS or Linux). Choose the PHP version recommended for your WordPress version, as this ensures compatibility.
Image
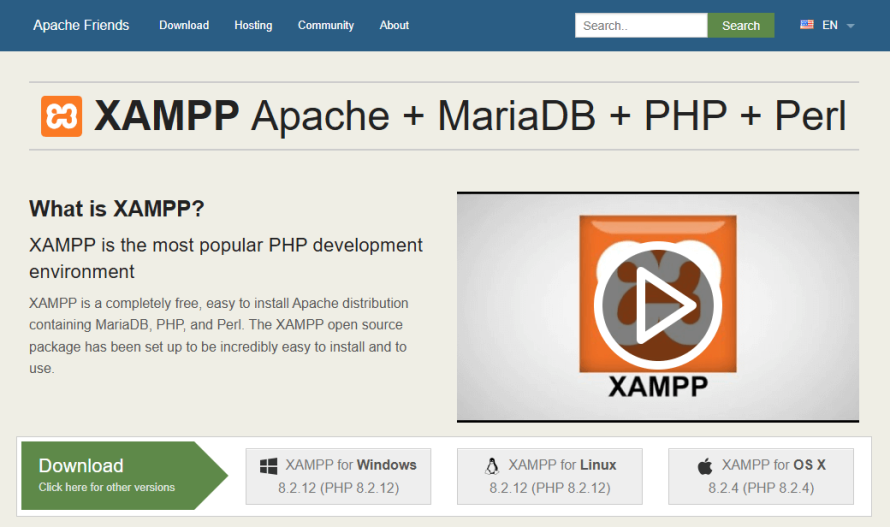
Once the download is complete, launch the installer. Follow the prompts in the setup wizard, making sure to install all components, including Apache, MySQL and PHP.
During installation, select a directory where XAMPP will be installed; the default option should be fine for most users. Once the setup wizard is complete, you’ll have XAMPP installed on your computer. A control panel should open automatically, giving you access to the server components.
Image
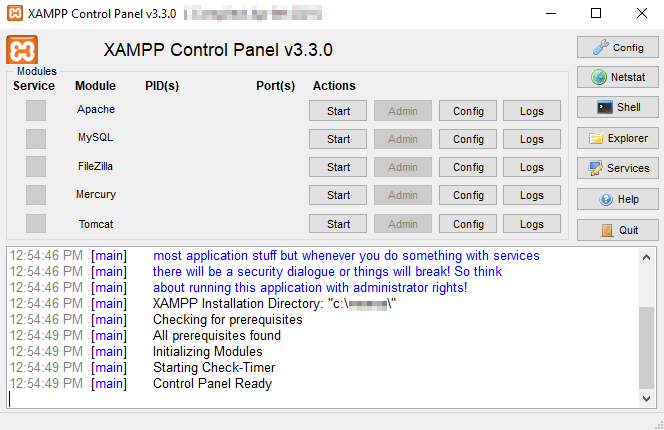
Step 2: Configure XAMPP and Start Apache and MySQL
With XAMPP installed, the next step is to configure it and start the essential services needed to run WordPress: Apache and MySQL. These components simulate a server environment, enabling you to host and manage your local WordPress site.
Launch the XAMPP control panel from your installation directory. On Windows, you can find it in the start menu or as a desktop shortcut. On macOS or Linux, navigate to the folder where XAMPP is installed and run the control panel application.
In the control panel, you’ll see a list of services. Locate Apache and MySQL, then click the Start buttons next to each. Once started, their status will turn green, indicating they’re running.
Image
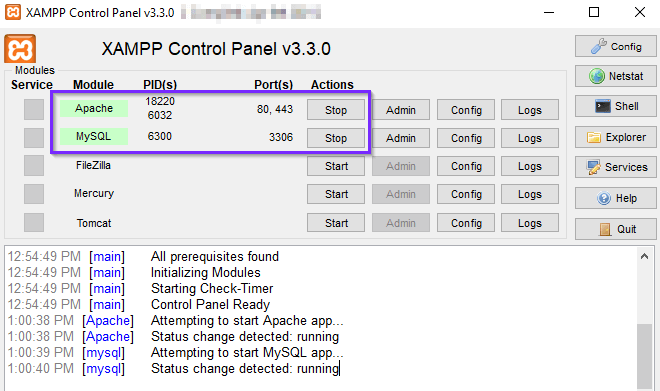
Occasionally, you might encounter port conflicts with Apache (often due to another program using port 80 or 443). If this happens, you can reassign the ports by clicking on Config next to Apache and adjusting the httpd.conf file to use an alternative port like 8080.
To verify functionality, open your web browser and type http://localhost into the address bar. If everything is working, you should see the XAMPP dashboard, confirming that Apache is running correctly. And to confirm MySQL is functioning, click Admin next to MySQL in the control panel to open phpMyAdmin, a web-based interface to manage databases.
Step 3: Create a MySQL Database for WordPress
Before installing WordPress, you’ll need a MySQL database to store your site’s content, user data and settings. Open your browser and navigate to http://localhost/phpmyadmin. This will load the phpMyAdmin dashboard, where you can manage MySQL databases.
In phpMyAdmin, click on the Databases tab at the top. Under Create database, enter a name for your database, such as “wordpress_local”. Use a name that’s easy to remember, as you’ll need it later when configuring WordPress.
Image

For WordPress, it’s recommended to use the utf8mb4_general_ci collation, which supports special characters and ensures compatibility with multilingual content. Select this from the dropdown menu before creating the database. Then, click the Create button to finalize your database setup. You’ll see the new database listed on the left-hand sidebar.
Note: While you won’t create specific user accounts for this setup, XAMPP’s default MySQL credentials are:
- Username: root
- Password: (leave blank)
Step 4: Download WordPress
Now that your local server environment is up and running and your MySQL database is ready, download WordPress. Go to the official download page and download the latest version of WordPress (a .zip file containing all the necessary files for installation). Once the download is complete, extract the .zip file, and you’ll have a folder named wordpress.
Locate the htdocs folder in your XAMPP installation directory. This is the root directory where your local websites are stored. For easy access, you can rename the wordpress folder to something like my_local_site or any name you prefer. This will also become the URL for accessing your local site (e.g., http://localhost/my_local_site).
Open your browser and go to http://localhost/your-folder-name (replace your-folder-name with the name of your WordPress folder). If everything is in place, you’ll see the WordPress installation screen, ready for the next steps.
Step 5: Install WordPress and Configure wp-config.php
Open your browser and navigate to http://localhost/your-folder-name, where the WordPress installation screen should appear. Choose your preferred language and click Continue. Then, fill in the form with your site details:
- The name of your site.
- A username for logging into the admin dashboard.
- A secure password.
- An email address for recovery purposes.
After that, click Install WordPress to finalize the setup.
Now that the WordPress files are in place, it’s time to check the wp-config.php file to connect and make sure your site is connected to the MySQL database you created earlier. The wp-config.php file acts as the bridge between WordPress and your local server environment.
Open the wp-config.php file in a text editor like Notepad++, Visual Studio Code or Sublime Text. Look for the following lines:
define( 'DB_NAME', 'database_name_here' );
define( 'DB_USER', 'username_here' );
define( 'DB_PASSWORD', 'password_here' );
define( 'DB_HOST', 'localhost' );
Make sure that the placeholders are replaced with your database details:
- DB_NAME: The name of your database (e.g., wordpress_local).
- DB_USER: Use root (the default XAMPP username).
- DB_PASSWORD: Leave this blank (the default XAMPP password is empty).
- DB_HOST: Keep this as localhost.
If not, then change them, save your edits and close the file.
Step 6: Access and Test Your Local WordPress Site
Testing your local WordPress installation ensures that your setup is ready for development. Open your browser and navigate to http://localhost/your-folder-name. This should load the homepage of your WordPress site.
To access the WordPress admin panel, append /wp-admin to your site URL. For example: http://localhost/your-folder-name/wp-admin. Enter the username and password you created during the WordPress installation.
Once logged in, you’ll be directed to the WordPress dashboard, where you can start managing your site. Navigate around your site to ensure all pages load correctly. Go to Appearance > Themes and try activating a theme to verify it applies without errors. Visit Plugins > Add New and install a plugin to confirm functionality.
Create a test post or page from the dashboard and publish it. Then, view it on the front end of your site to ensure WordPress is saving and retrieving data from the MySQL database correctly.
If your site doesn’t load or you encounter errors, double-check your wp-config.php settings to ensure the database details are accurate and that Apache and MySQL are running in the XAMPP control panel.
Congratulations! You’re ready to start creating custom themes, testing plugins or developing content, all without the risk of impacting a live site!
Benefits of Installing WordPress Locally
Working with WordPress locally offers a range of advantages that can streamline your development process, enhance your skills and provide a risk-free environment for experimentation. Here are some key benefits:
- Safe testing environment: Installing WordPress locally allows you to test themes, plugins and customizations without affecting a live website. This eliminates the risk of breaking a production site and ensures a smooth experience for your audience.
- Offline development: With a local installation, you can work on your WordPress site without an internet connection. This is particularly useful for developers and designers who want to stay productive while traveling or during downtime.
- Faster workflow: Local environments are significantly faster than working on a remote server because everything is happening directly on your computer. Page loads, file updates and database queries are instantaneous, speeding up development.
- Debugging and experimentation: A local setup is the perfect sandbox for trying out new features, debugging code or experimenting with advanced configurations. You can freely explore and learn without impacting a live audience.
- No hosting costs: Running WordPress locally saves money because you don’t need a paid hosting plan during development. It’s a cost-effective way to start projects and test ideas.
- Preparation for live deployment: By working locally, you can ensure your site is fully functional and optimized before deploying it to a live server. This minimizes downtime and ensures a polished final product.
Alternative Methods of Installing WordPress Locally
While XAMPP is a popular choice for setting up a local WordPress environment, it’s not the only option. Depending on your needs, preferences and technical expertise, you might find other tools more suitable for local development. Here are three powerful alternatives:
DDEV
Image
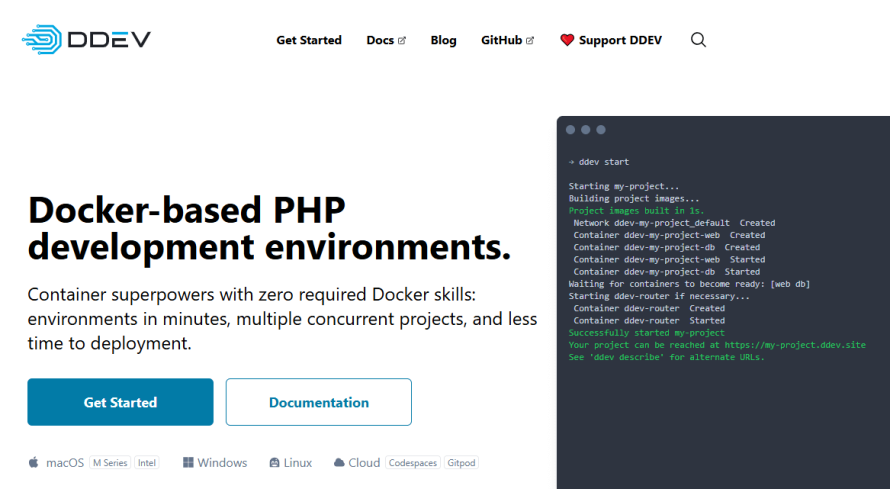
DDEV is a modern, container-based local development tool built on Docker. It’s designed to simplify the process of setting up and managing environments for WordPress and other platforms because:
- It is pre-configured for WordPress, Drupal and more.
- It works easily with Docker, making it lightweight and efficient.
- It provides HTTPS support locally, mirroring live server environments.
If you’re comfortable with Docker or looking for an advanced, flexible tool that mimics production environments, DDEV is an excellent choice.
Docksal
Image
Docksal is another Docker-based development environment that focuses on consistency and ease of use. It offers pre-configured stacks for WordPress and other CMS platforms. It’s a good choice because:
- It provides a fully containerized environment with tools like Apache, Nginx, PHP and MySQL.
- It allows easy version switching for PHP and other components.
- It supports integration with CI/CD workflows.
Docksal is great for teams that need a consistent, shareable environment and developers who want precise control over their stacks.
Lando
Image

Lando is a developer-friendly local development tool that abstracts away much of the complexity of Docker. It’s designed for flexibility and supports a wide variety of frameworks, including WordPress. Its main characteristics include:
- Easy setup with pre-configured recipes for WordPress.
- Extensibility and customizability via YAML configuration files.
- Integration with hosting platforms like Pantheon.
Lando is perfect for developers who want a quick and flexible way to spin up local environments with minimal hassle. It also integrates smoothly with Pantheon, making deployment easier.
Troubleshooting Common Local WordPress Issues
Apache or MySQL Won’t Start
If the Apache or MySQL services fail to start in the XAMPP control panel, the issue is likely in a port conflict.
Solution:
- Check if another program (like Skype or VMware) is using port 80 or 443.
- Open the XAMPP control panel, click Config next to Apache and edit the httpd.conf file.
- Change the Listen 80 line to a different port, such as Listen 8080. Save the file and restart Apache.
Cannot Access phpMyAdmin
When navigating to http://localhost/phpmyadmin, you might see a “403 Forbidden” or “Access Denied” error.
Solution:
- Open the phpMyAdmin configuration file (config.inc.php) in the XAMPP directory.
- Look for the section about allowed IPs and ensure your local machine’s IP is permitted. For most cases, adding 127.0.0.1 resolves the issue.
Database Connection Error
Seeing the “Error establishing a database connection” message when trying to load your WordPress site?
Solution:
- Double-check your wp-config.php file to ensure the database name, username (root) and password (blank for XAMPP) are correct.
- Verify that MySQL is running in the XAMPP control panel.
Broken Permalinks
If your site’s pages or posts return a 404 error, permalinks might not be working properly.
Solution:
- Go to your WordPress dashboard, navigate to Settings > Permalinks and click Save Changes without altering the settings. This refreshes the .htaccess file.
- If the issue persists, ensure that the Apache module mod_rewrite is enabled. You can enable it via the XAMPP control panel under Apache > Config.
Slow Performance
If your local WordPress site is loading slowly, it might be due to your system resources or the way XAMPP is configured.
Solution:
- Ensure no unnecessary services are running in the background.
- Increase the PHP memory limit by editing the php.ini file in XAMPP. Look for memory_limit and increase its value (e.g., 256M).
- Consider switching to a Docker-based solution like DDEV or Lando for better performance.
White Screen of Death (WSOD)
The infamous “white screen of death” can appear with a PHP error or a plugin/theme conflict.
Solution:
- Enable debugging in WordPress by adding the following to your wp-config.php file:
define( 'WP_DEBUG', true );
define( 'WP_DEBUG_LOG', true );
define( 'WP_DEBUG_DISPLAY', false );
- Check the debug log file in the wp-content directory for details about the error.
- Deactivate plugins or themes by renaming their folders in wp-content to isolate the issue.
Streamline Your WordPress Workflow with Pantheon
Installing WordPress locally is a fantastic way to experiment, test and develop your site without affecting a live environment. When it’s finally time to take your project live or collaborate with a team, you need a platform that combines speed, reliability and modern development tools.
Pantheon offers a cutting-edge hosting solution designed specifically for WordPress and Drupal sites. With built-in developer tools, automated workflows and scalable infrastructure, Pantheon makes deploying and managing your site easy.
In fact, Pantheon’s cloud-based platform elevates the concept of the local environment by mirroring live conditions, eliminating the guesswork when it comes to testing and going live.
Here are some reasons why you should choose Pantheon:
- Effortless collaboration: Work smoothly with teams using development, testing and live environments.
- Blazing speed: Benefit from Pantheon’s high-performance hosting infrastructure.
- Workflow automation: Streamline updates, backups and deployments with ease.
- Expert support: Get help when you need it from Pantheon’s WordPress experts.
Contact Pantheon today and see how it can transform the way you build and manage WordPress websites!